
DIY Dream Catchers
SHARE
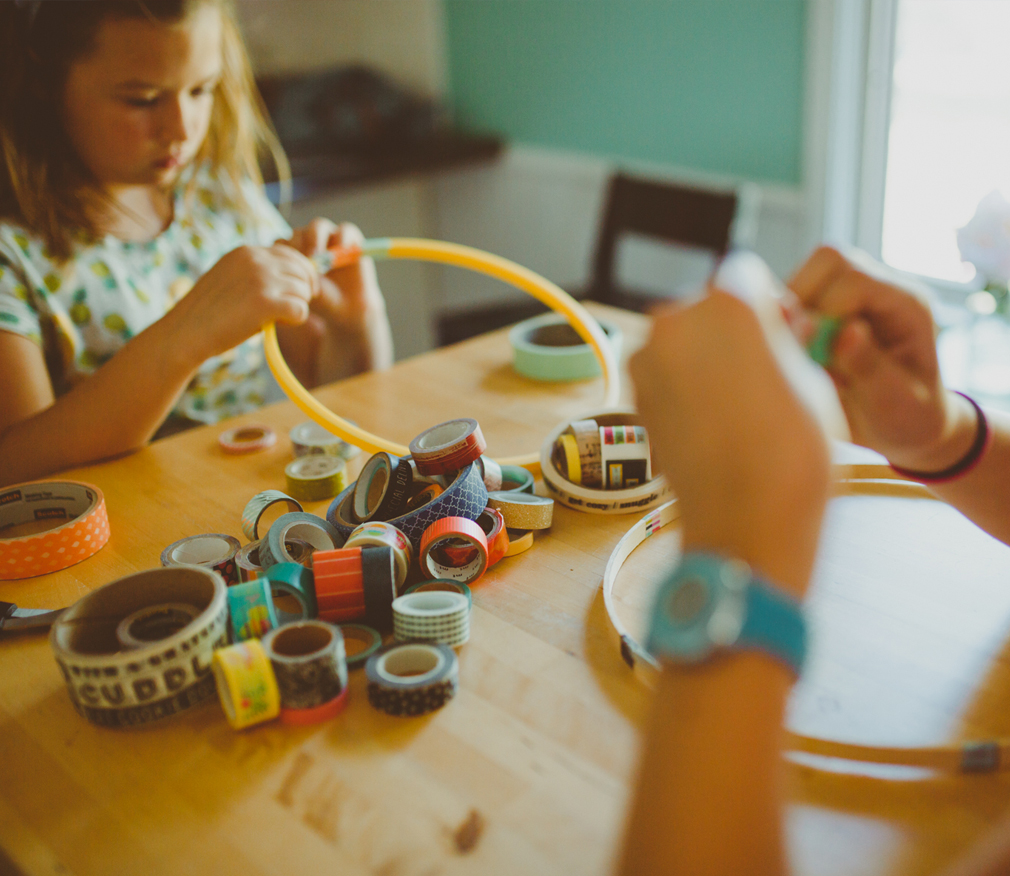
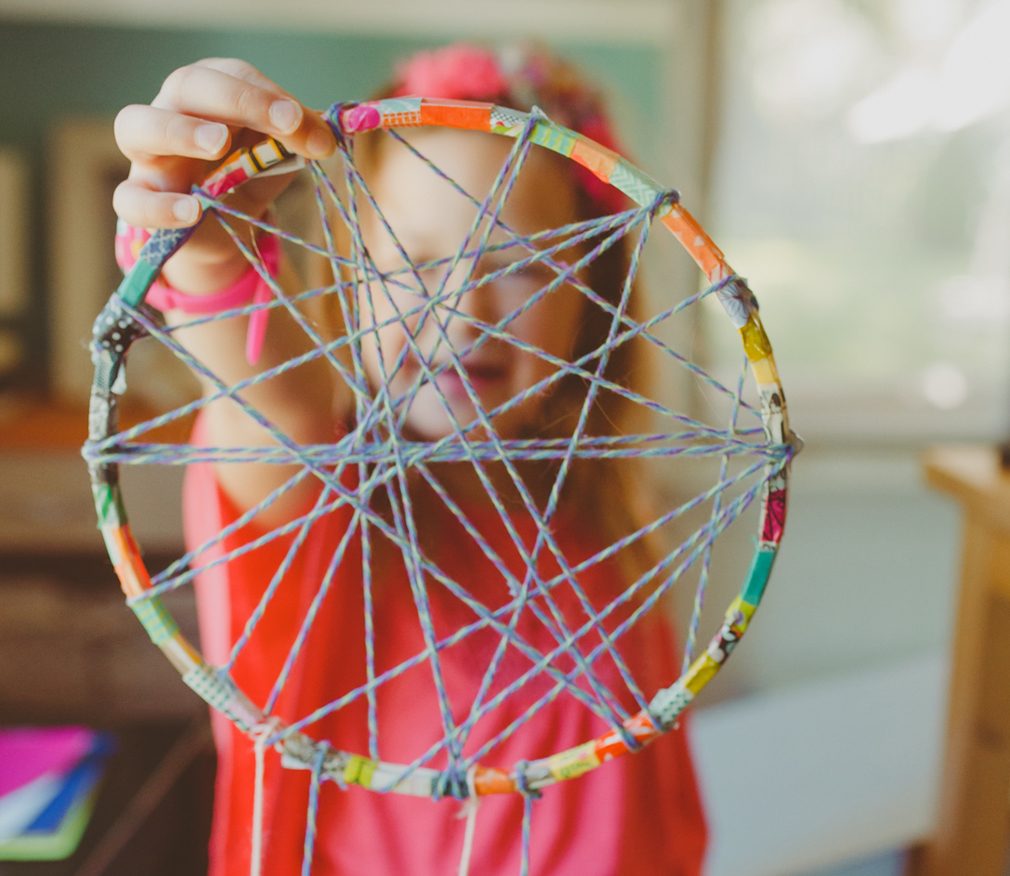
Create your very own dream catchers with photographer Stacy Kron. This are a fun project for when mom has lower energy, but still wants to create something beautiful and inspiring with her kids. Great for children age four and up. Kids love wrapping the washi tape around the hoop and creating patterns with the string.
Special thank you to: Stacy Kron, mom and photographer of Stacy Kron Photography, Alexandria, MN for doing this activity with her girls!
WHAT YOU NEED:
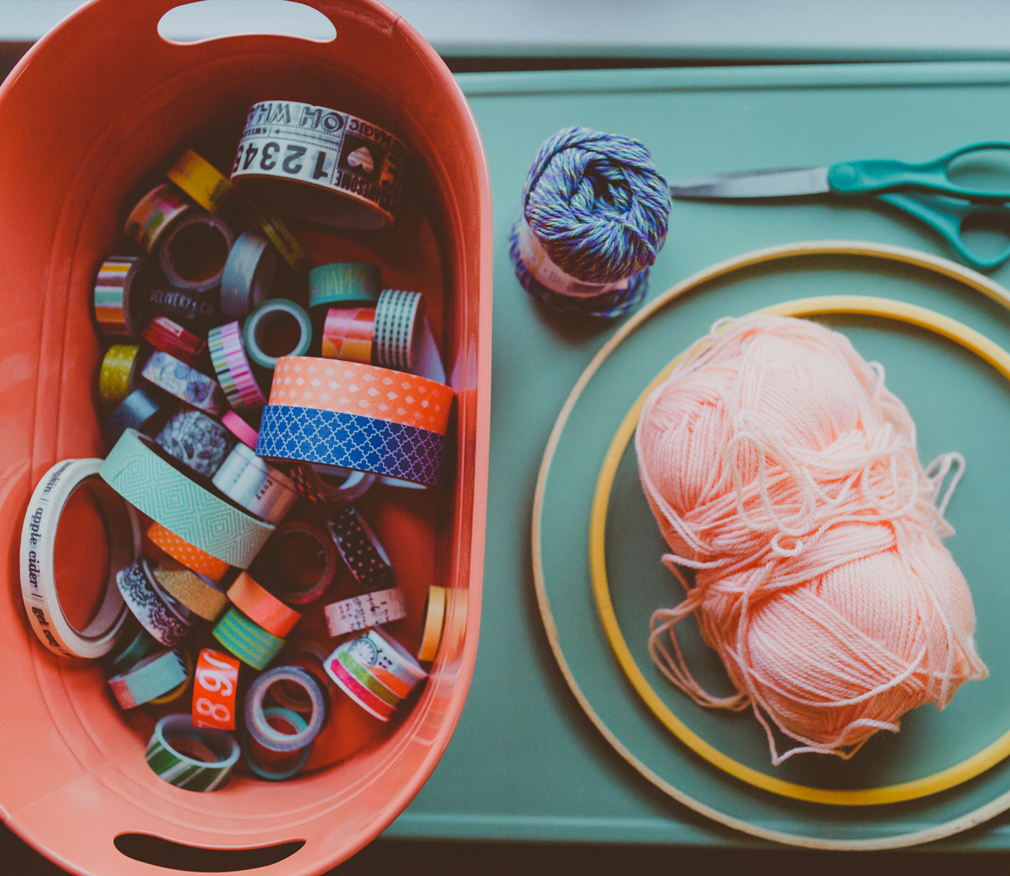
Embroidery Hoops
Washi Tape
String
Scissors
Hot glue gun or strong craft glue
Beads
Felt (optional)
Construction paper (optional)
Nail to hang on wall
The Legend of the Dream Catcher:
The Ojibwa (Chippewa) believe that night is full of both good and bad dreams. When a dream catcher is hung above the place where you sleep it moves freely in the night air and catches the dreams as they drift by. The good dreams, knowing their way, pass through the opening in the center of the webbing while the bad dreams, not knowing the way, are caught in the webbing and destroyed at the first light of the morning sun.
There are many variants to the dream catcher legend, some which say both the good and bad dreams are captured and some which say the good dreams slide down the feather to those sleeping below. Although the Ojibwa are credited as the first people to use Dream Catchers many other Tribes and Native peoples have adopted Dream Catchers into their culture. Even though the designs and legends of Dream Catchers differ slightly, the underlying meaning and symbolism is universal and is carried across cultures and language barriers.


DIRECTIONS
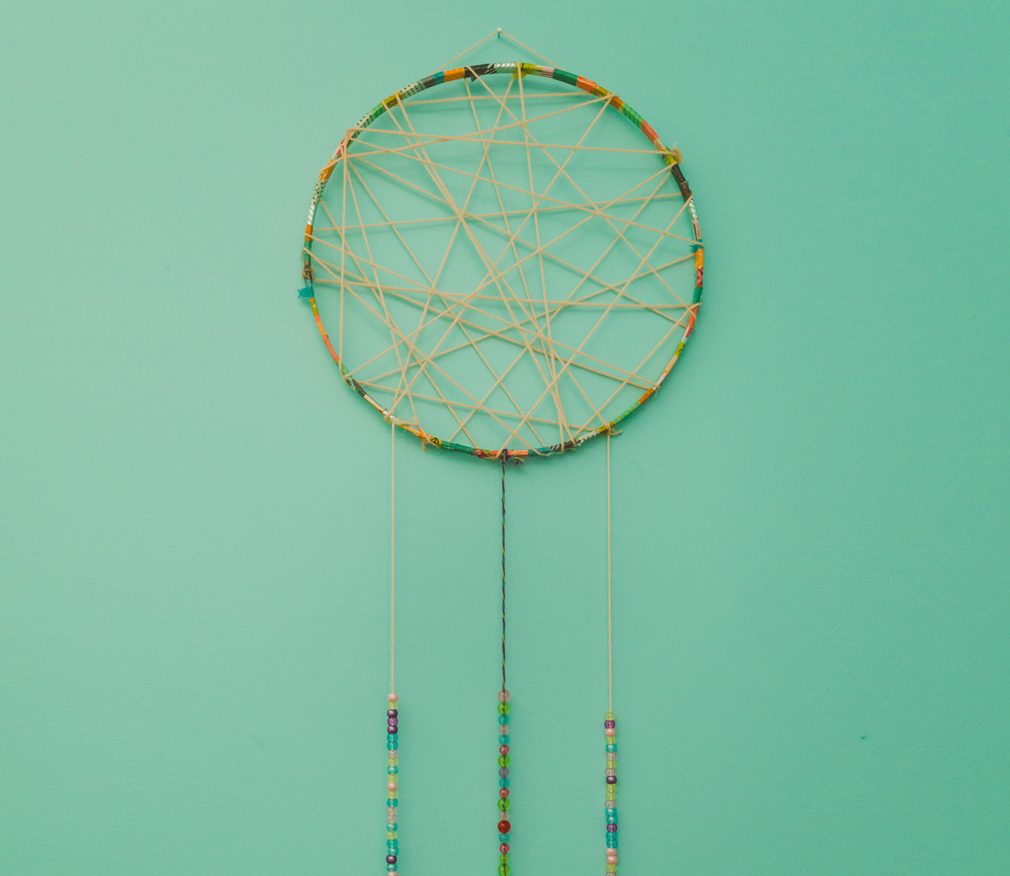
1 Cut or tear washi tape into pieces a couple inches long. Wrap tape around the entire embroidery hoop. (This took my girls about an hour.)
2 Now you’re ready to make the web of string. Hot glue the end of the string to the hoop, to prevent it from sliding around. We also dabbed a dot of glue on the other points of contact of the string and hoop.
3 Then cut sting for the length that you want the beaded pieces. I helped tie a knot to the base of those strings and then the beads were ready to be strung. You can leave as is, or add more decorations such as felt, paper or feathers.
4 Now you’re ready to hang above your child’s bed!
5 Start dreaming!