
Punched Paper Garland

SHARE
This two step project is awesome, starting with watercolor painting, cutting paper and ending with a beautiful hung garland. A nice project for when mom doesn’t have a lot of energy and great for children five years old and older, and even crafty moms. This is a simple and gorgeous activity. You could even go all out and do your child’s entire ceiling with them.
A special thank you to: Stacy Kron, mom and artist of Stacy Kron Creative, Alexandria, MN for doing this wonderful activity with her girls!
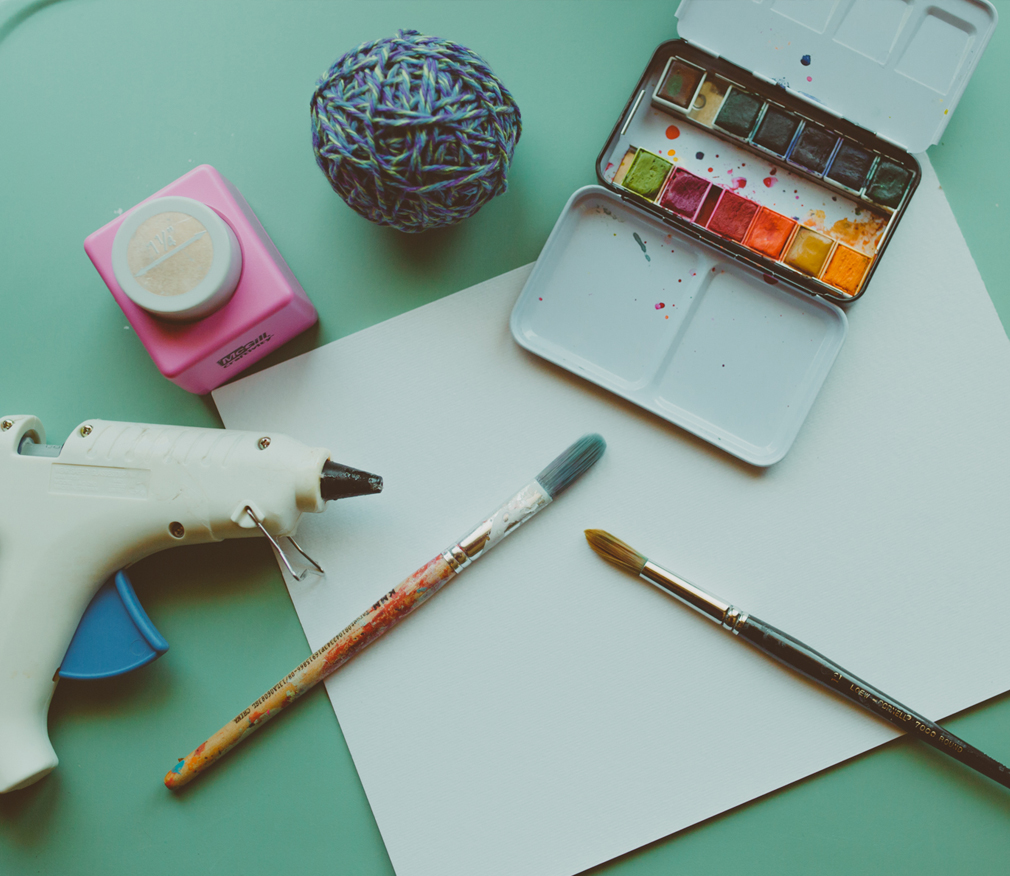
WHAT YOU NEED:
2-3 sheets of paper (I recommend watercolor paper, but any thick paper will work.)
Watercolor paints
Paint brushes
Bowl for water
Paper puncher (I used a 1 1/4″ puncher, found at any craft store)
String (several feet, depending on how long you want the garland to be.)
Hot glue or strong craft glue
Nails to hang garland

DIRECTIONS
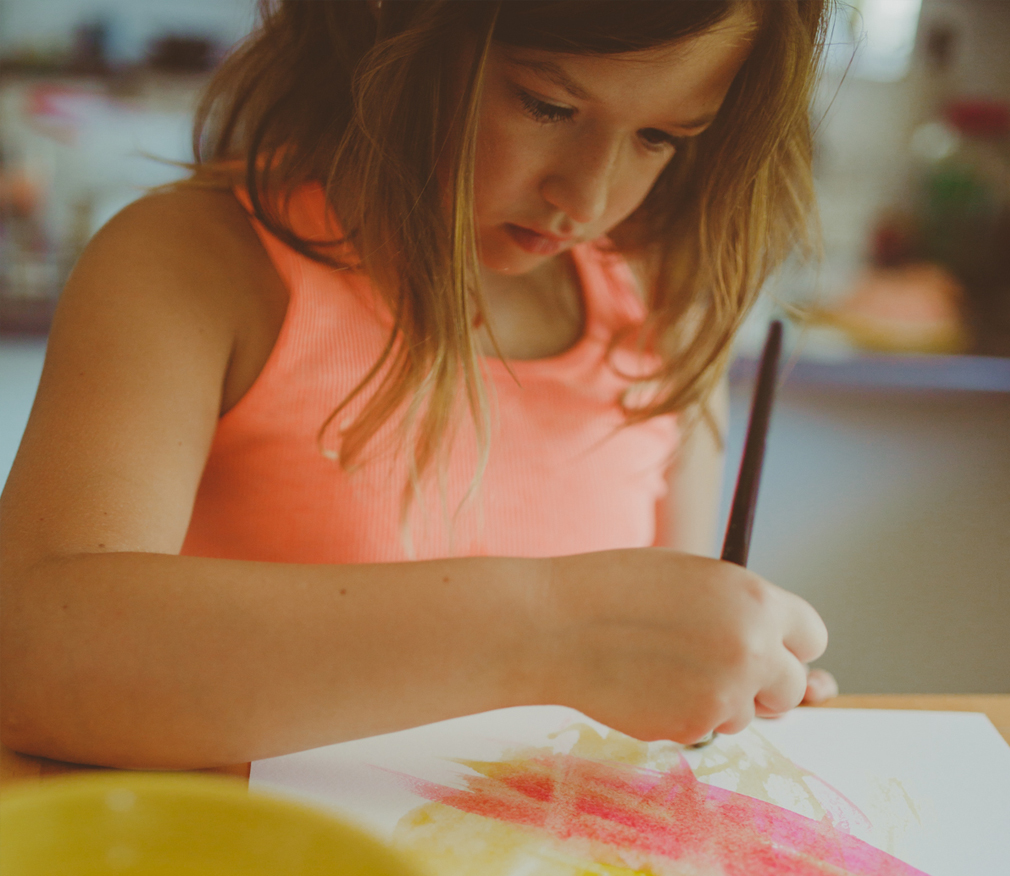
1 Set your kids up with a sheet of watercolor paper and let them loose with painting whatever they wish. Only one side of the paper needs to be painted. Let the paper fully dry.
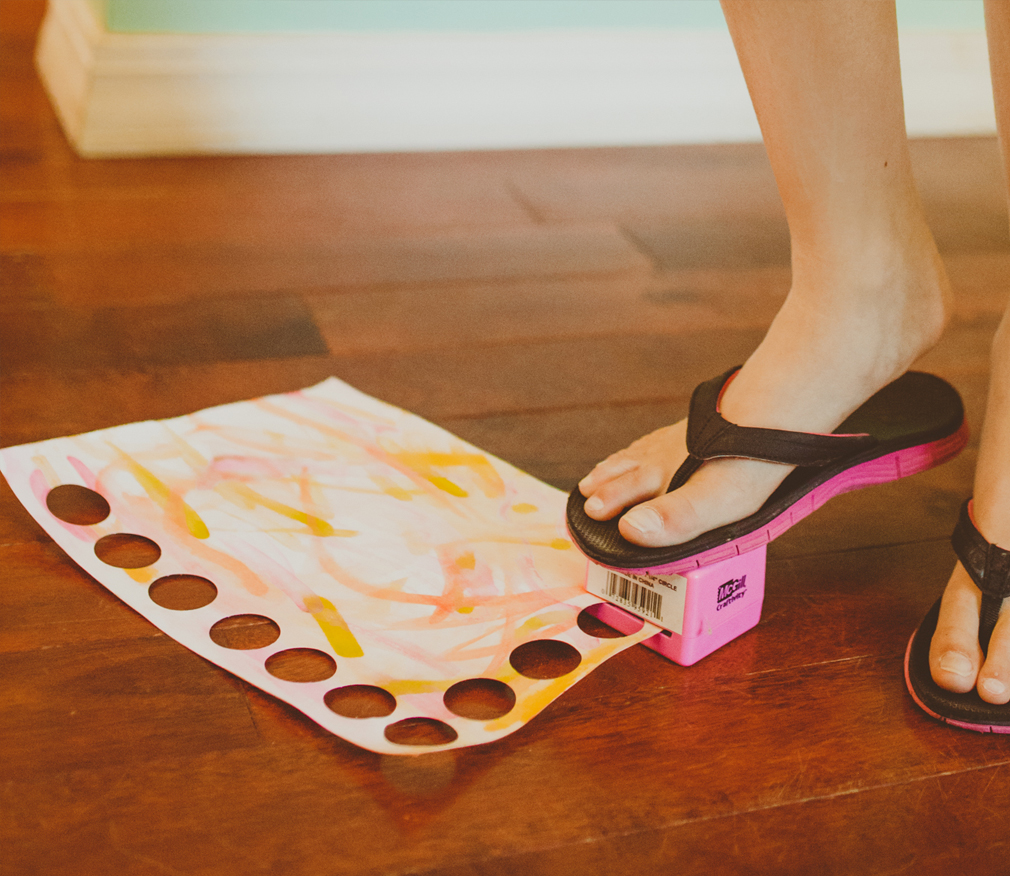
2 Use the paper puncher to create the circle shapes. I found that it was much easier to step on the puncher than to use my arms. Stepping on the puncher is easy and fun for a kid to do.
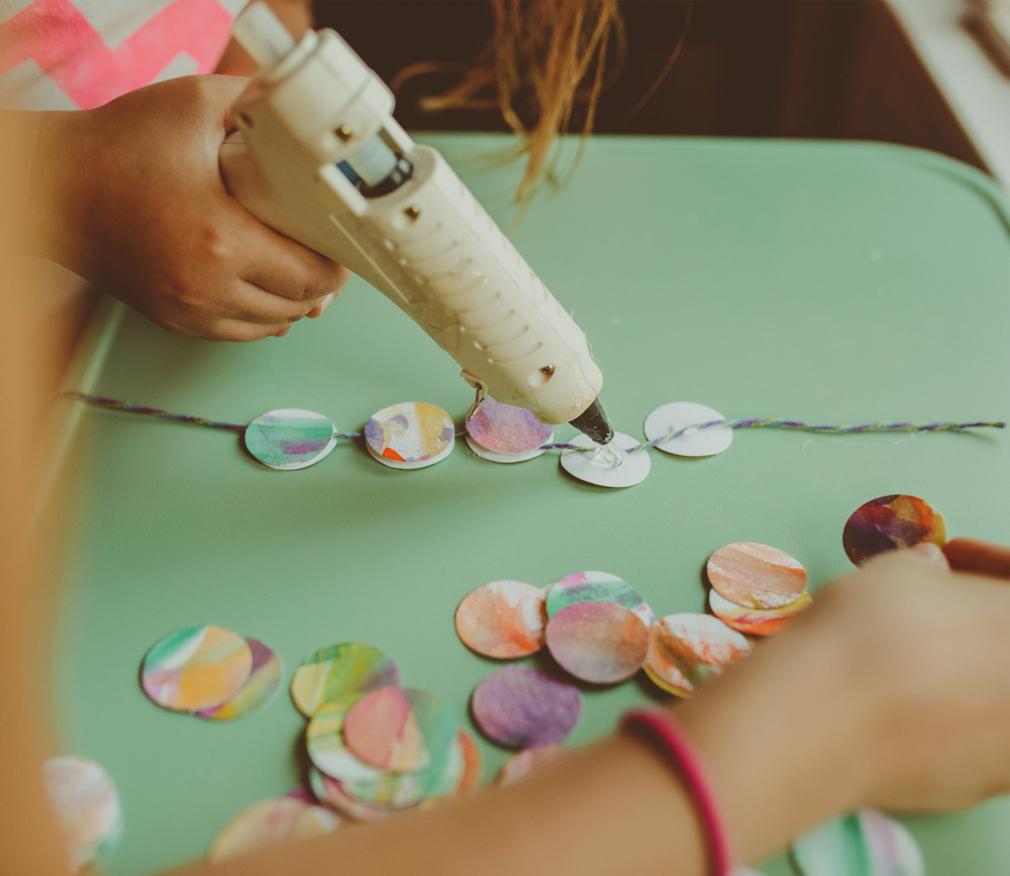
3 When all of the paper is punched, you’re ready to start glueing it to the string. We used hot glue, and I assisted to make sure my kids didn’t burn themselves. (Another option is to sew the circles together with a sewing machine.)
4 Once you’ve filled the length of the string with paper punches, you’re ready to hang!